Help Docs
MacENCx64 Online Documentation
Using Charts
Once a cell (vector) or chart (raster) is displayed, there are several available operations and options.
View Menu
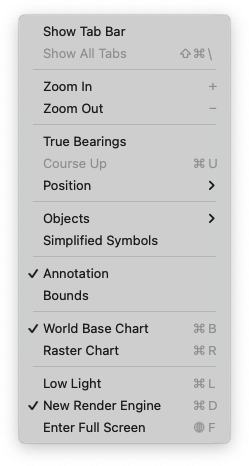
Objects - select the items you want to display on the map for easier reading. (Original MacENC Render Engine only)
Simplified Symbols - more concise navigation icons will be displayed on the map (vector maps only).
Annotation - allows you to enable or disable the display of annotations made on the map.
Bounds - chart Boundary displays the frames (in red) of the maps contained in or overlapping the open map (raster maps only).
World Base Chart - toggles the display of the world base map picture.
Raster Chart - toggles display of Raster (RNC) charts instead of vector (ENC) charts. See Note below.
Low Light - Reduced Brightness display for night viewing mode.
New Render Engine - toggles between New Render Engine and Original MacENC Render engine display.
Note: Raster Charts are only displayed on the Original MacENC Render Engine in the current release. Toggle New Render Engine OFF (no check mark) and Raster Charts ON (check mark) to view.
Objects Sub-menu
Original MacENC Render Engine Objects
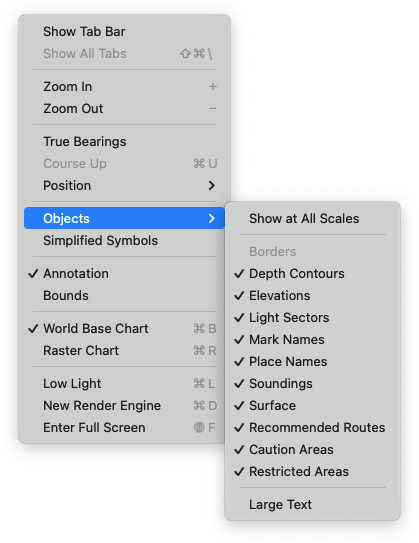
- Show at all scales - displays soundings regardless of scale setting.
- Toggles for nautical chart objects from Depth Contours to Restricted Areas.
- Large text - displays increased font size for text on charts.
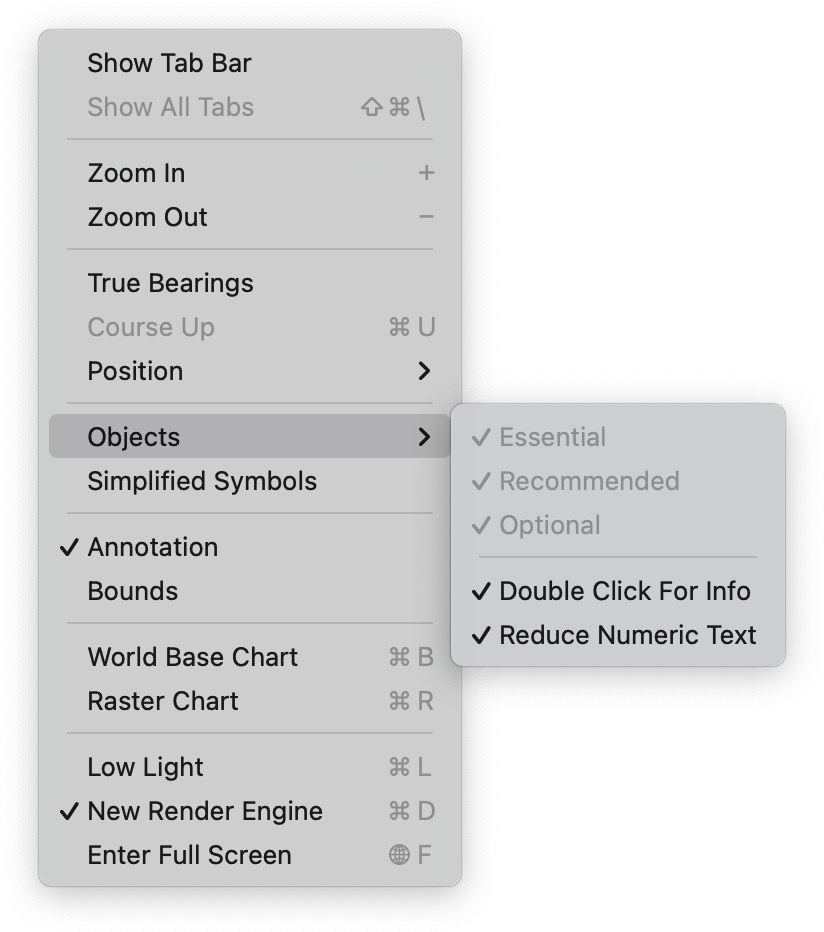
New Render Engine Objects
-
Nautical chart objects cannot be turned off in current version. A future release will provide options to control which nautical chart objects are shown.
-
Double Click For Info - Default behavior is single click to display the HUD info widget. Toggle this to two clicks to prevent accidental info display.
-
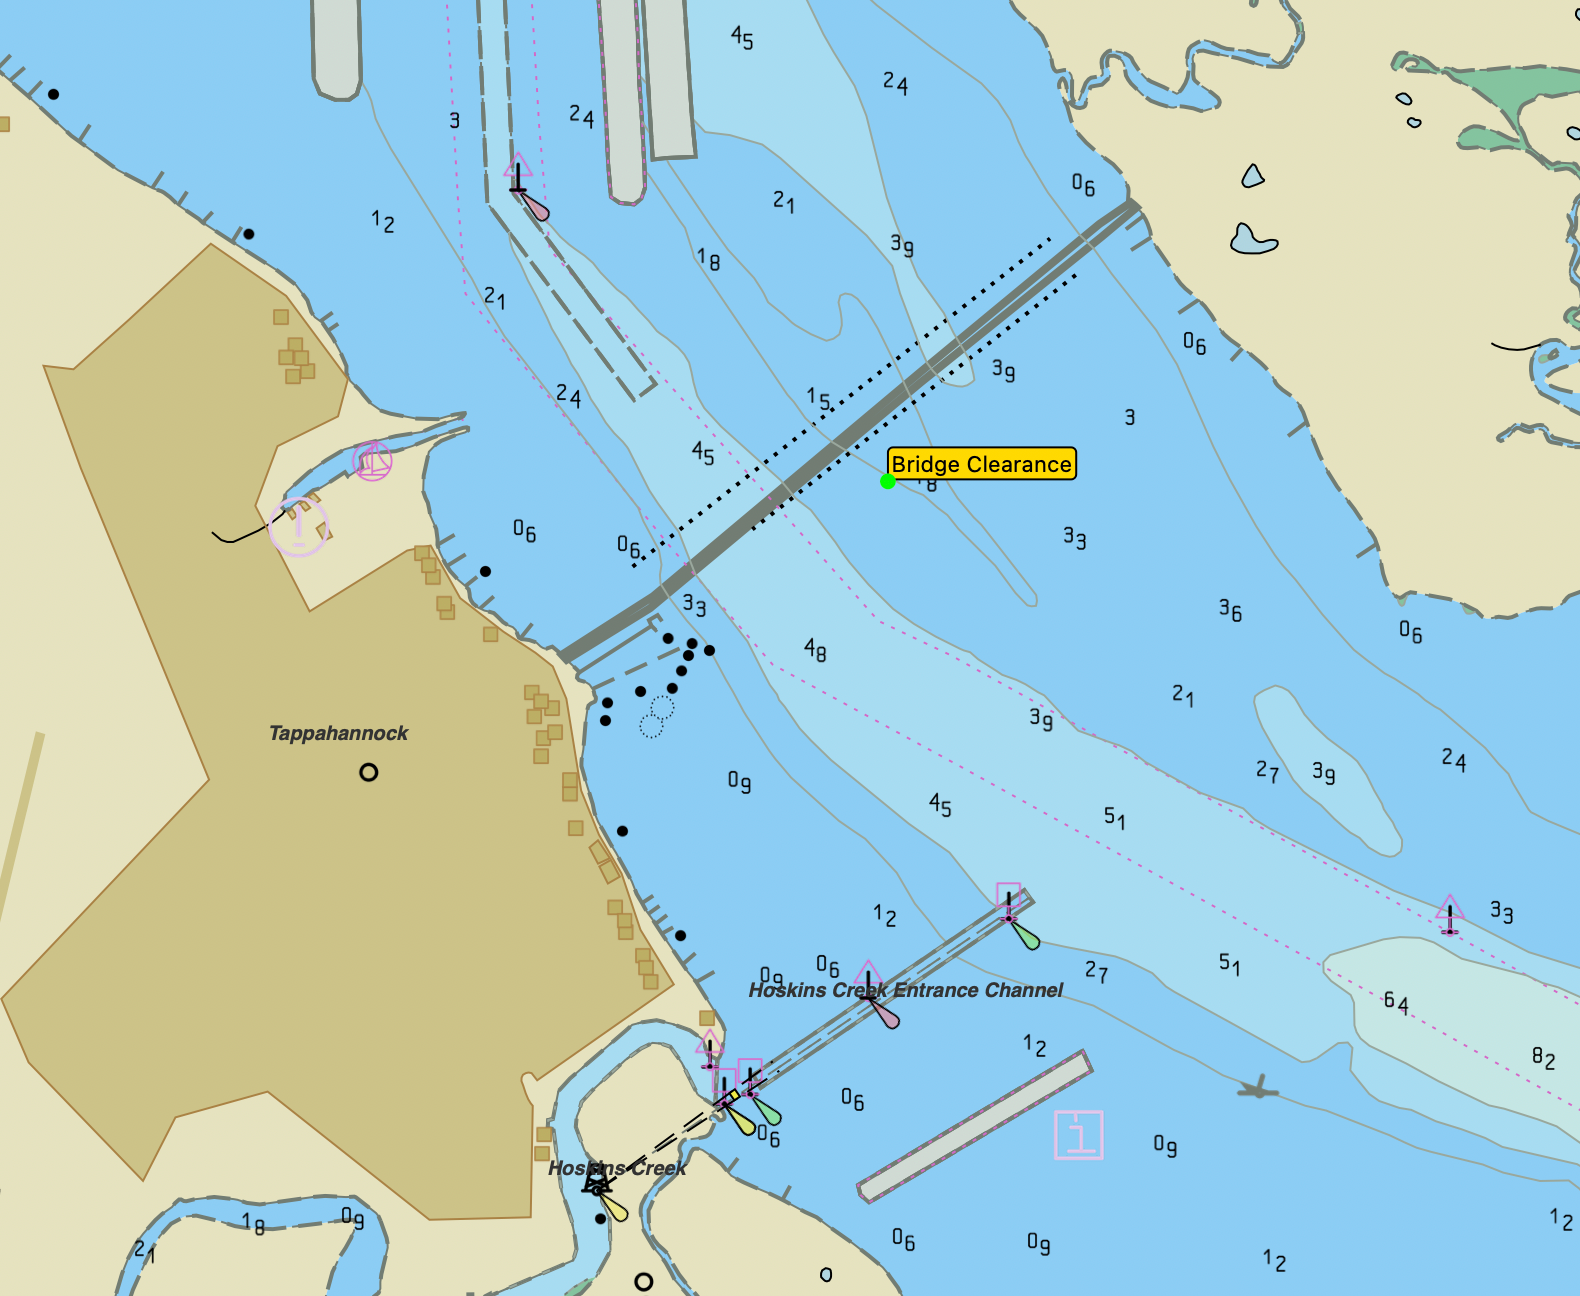
Reduce Numeric Text - Option to reduce some clutter by turning off numeric text clearing names and data for ATONs and numeric data for some objects (eg., Bridge Clearance). The information no longer displayed can still be viewed by clicking for info. Toggle setting is remembered between sessions.
Example Difference Numeric Text ON
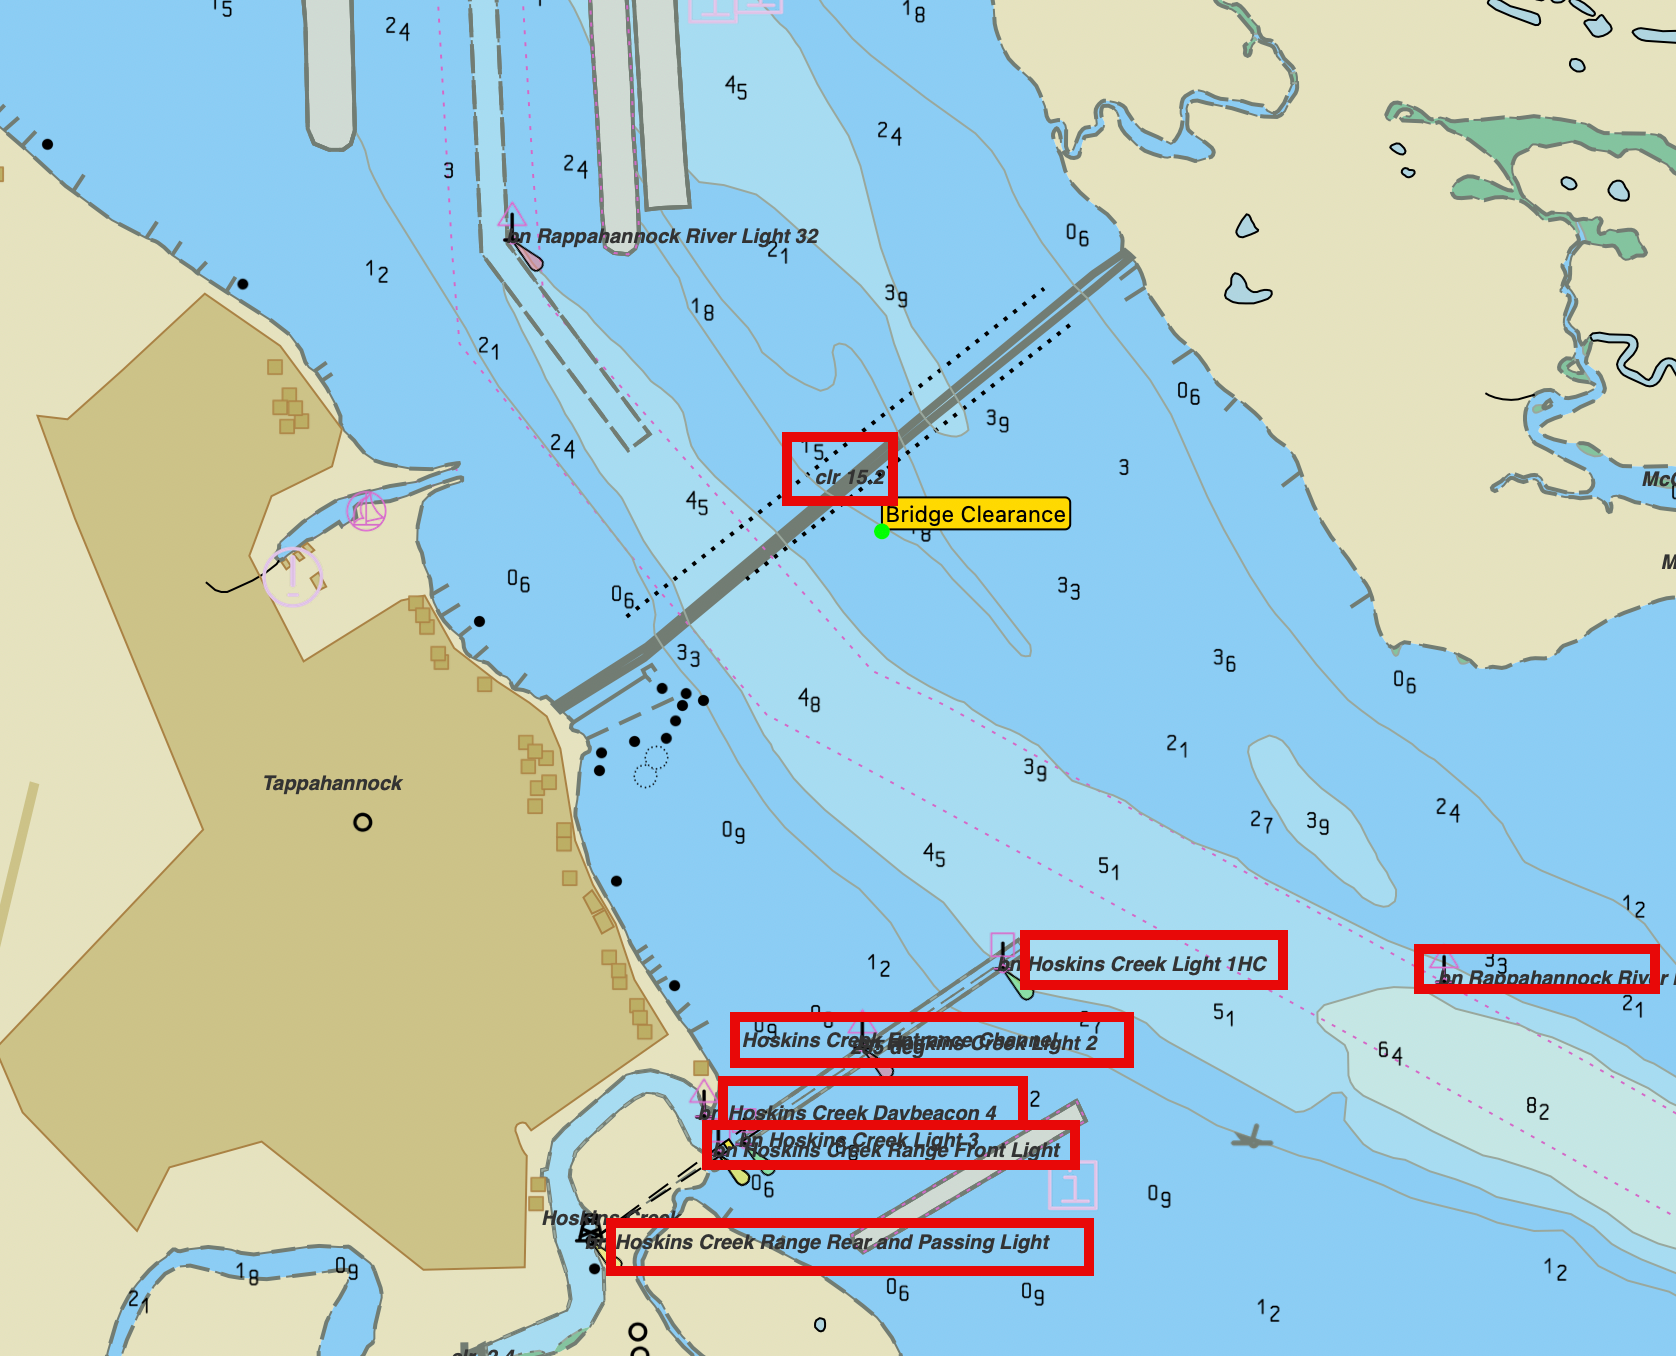
Example Difference Numeric Test OFF
Panning, Scrolling, Moving, & Zooming
Zoom
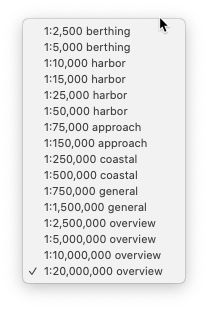
The Scale popup menu on the Chart toolbar is set to the standard NOAA levels allowing direct jump to the range and zoom scale desired.
The cell detail slider  will allow cells of less or more detail to be shown if they exist (only in Original MacENC Render Engine mode). For example, if you are viewing a general cell, the slider can be moved right to see any underlying harbor cell or moved left to see any coastal cell. The slider position will be reset to the center whenever the zoom scale is changed.
The New Render Engine covers this function in a different way using the Active Object Widget. See Chart View Heads Up Display (HUD) topic.
The [+] and [-] keys allow the cell or chart to be zoomed in and out sequentially.
Trackpad scroll gesture or mouse scroll wheel will zoom in and out.
Pan & Scroll
The arrow keys allow panning and scrolling. The page keys allow the chart to be scrolled.
Select the Hand button  to drag/scroll the Chart window. Also selected by holding down the space bar.
Grabbing and dragging the display rectangle in the Overview window, will pan/scroll the chart display to the selected area.
Move
Single click anywhere on the Chart window while holding down the option key to center the Chart window to that point.
Double click anywhere on the Chart window to zoom and pan to the clicked location.
Select the selection button  to choose an area of the Chart window to zoom. Drag to create the selection.
In Waypoints, Routes, and other areas, scroll to will jump the chart display to the selected spot.
While up, the Chart Manager view of cells, charts, or objects can be individually selected and scroll to will center the main display to that object’s location.
Chart object information (Original MacENC Render Engine) - Single click on the chart window on a cell (vector) and any object (buoy, light, land feature) and details about that object(s) will be shown in the Object tab of the Navigation panel. They will be sorted from smallest to largest area. The More Info button will be available when an object contains more information such as additional text or a picture. Select the record indicated by 'Select More Info' then select the More Info button.
Chart object information is handled in a different and less complex way in the New Render Engine. See New Render Engine Heads Up Display (HUD) topic for details.
The Mode buttons  toggle the mouse action on the Chart window:
-
Select the Waypoint button
 to move waypoints. Move the cursor over any waypoint name on the Chart window and drag.
 -
Select the Pen
 button to annotate the Chart window. The pen color can be selected with the adjacent color well. To remove an annotation control click on it and select Delete from the context menu or use the delete key. To remove all annotations, use the Delete All Annotations button in the Preferences window.
 -
Select the line measure button
 to get a distance and bearing from a point and/or move the mouse cursor anywhere on the Chart window to obtain a position. If the GPS panel is opened (via menu items Connect -> GPS) and a current position is transmitted from the connected GPS, that position will be used as the origin of measurement. To use a different origin hold down the command key before dragging. To use the selected waypoint in the
Waypoint window, hold down the option key before dragging.
If the GPS panel is opened (via menu items Connect -> GPS) and a current position is transmitted from the connected GPS, the Chart window will scroll with the position as long as the menu item Position Centered on the View menu is selected otherwise press the ^ button to center the chart to the current GPS position or select a waypoint to scroll to. The orientation of the chart can be set to [ourse Up which will use the bearing to the active waypoint, otherwise use the GPS course over ground. The position Icon attributes such as Color and Size can be selected in the Preferences window. The Velocity Vector will draw a line segment in front of the position equal to the length of the selected time.
In the View menu checking the Low Light menu item will dim the intensity of the cell or chart displayed. In the View menu checking the Bounds menu item will display the bounds of each cell or chart. Loaded cells or charts will be in red. In the View menu checking the Simplified Symbols menu item will display more concise navigation icons on the chart. In the View menu checking the World Base Chart menu item will toggle display of the base World chart.
command clicking on any chart or cell name in the Chart window will select it in the Chart Manager.
control click anywhere on the Chart window displays a context menu.
Raster Chart selection control. Control clicking on a raster chart will display a context menu allowing manual selection of any raster chart that intersects with the viewed area. Those charts that are listed in a bold font contain the position where clicked. If a specific chart is selected and the view is scrolled such that the chart is no longer visible then Automatic chart selection will resume. You can select a specific chart to display only from the list or select automatic which will display the right chart for your location and scale setting.
Selecting AyeTides from the context menu will open up the AyeTides application to the closest station where clicked on the chart. In order for this to work the AyeTides application must be
installed on your Mac in the Applications folder. AyeTides
Mac ![]() can be downloaded from the App Store.
can be downloaded from the App Store.
Selecting Google Earth from the context menu will open up the Google Earth application to the location clicked on the chart. In order for this to work the Google Earth must be installed on your Mac in the Applications folder. Google Earth can be downloaded from the App Store. For more info, visit:
Selecting Maps from the context menu will open up the Apple Map application to the location clicked on the chart.
Position Formats
Can be in one of the following formats:
DDDºMM.MM'H (example: 37º41.87'N)
[OR]
HDDD.MM.MMM (example: N37.41.87)
[OR]
DDD.DDDDDDH (example: 37.697248N)
[OR]
DDDºMM'SS.S"H (example: 37º42'49.2"N)
The position format is set in the MacENC -> Preferences Units dialog (See preferences overview). These effect the display of all latitude and longitude positions shown throughout MacENCx64.